First Person Shooter Game
Rex Cason II, Erik Larson, Jonathan Robertson, Jonathan Frisch, George Trice III and Dr. Lakshmi Prayaga
|
 |
REFEREED
COLUMN

PDF Version |
Abstract
3D game development is an exciting activity for many students. But getting a handle on 3D game development for novices may be a daunting task. We take this opportunity to present a quick introduction to 3D game development through a few tutorials. For the next few columns a set of tutorials for a 3D first person shooter game developed by graduate and undergraduate students under the guidance of a faculty member from the University of West Florida will be presented. These tutorials were developed with 3D game Studio by Conitec. To follow along, download the software from www.conitec.com. These tutorials include all elements of game development such as modeling and animation, lighting, collision detection, sound and scripting. Each tutorial will focus on one or more of these aspects. This week we start out with creating a room and adding some objects to the room. The instructions for this are presented below.
1 IMPORTING A MODEL
Importing a Model is easy and fun! Models can include your character, non-player characters, level objects, weapons, health supplies, etc. To make a working entity in GameStudio, you must first import a 3D model and then assign functions, or behaviors, to the model. These functions give models unique properties. For example; if you import a model of an elf, you can assign player functions to the model that will allow you to control the elf. Likewise, if you import a health pack, the functions you assign to it will make the model act like a health pack. Things can get really crazy if you assign functions to models incorrectly! How funny would it be if you ran into the elf and it healed you while you controlled the movement of a health pack!
- First open the WED (World Editor Program), and click Object -> Load Entity

- It is very important that your model is saved into GameStudio's "Work folder"
This folder is usually under "C:\Program Files\GStuido6\work" – this is the default folder in the popup menu

- From here, select your model and Click Open (open "cbabe.mdl" or "warlock.mdl" )

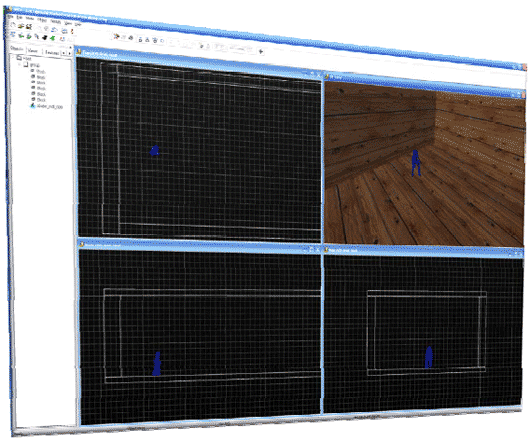
- Notice that "cbabe" may be outside of your room. To get her within the room, simply click the Move button (on the toolbar) and drag her into the room. Be sure to examine all windows to make sure that she's properly aligned
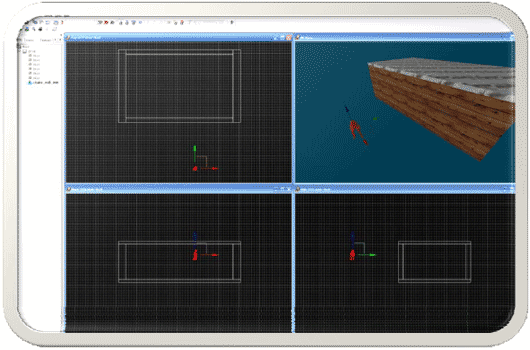
- Your model is now inserted into your level. Wow! That was easy! You can now continue to move this model wherever you want it in your level. You can resize and rotate it!
2 ASSIGNING A FUNTION/BEHAVIOR
Once you have the model in your level, you probably want it to do something. In order for your model to have some sort of properties, you must assign a function, or Behavior, to the model. To begin with, make sure that you have assigned a script to the game that you are making. The script, which is written in a programming language called C-Script, is what contains all the variables, functions, and other bits of code that will add to making your game awesome!
Code1.wdl
Open the SED (Script Editor) and copy & paste this code into it. Save the file as "Code1.wdl" into the work folder (usually under " C:\Program Files\GStuido6\work ") 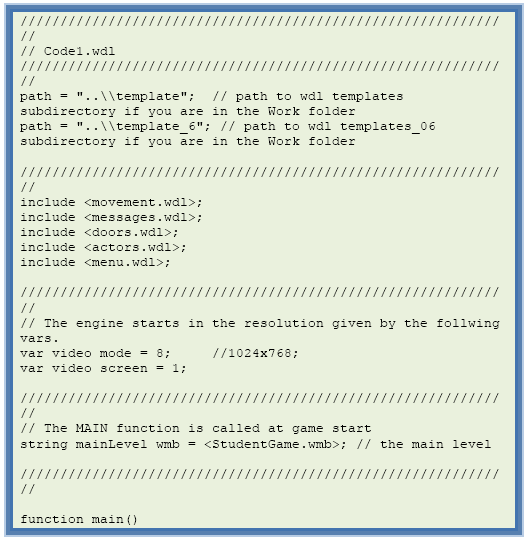
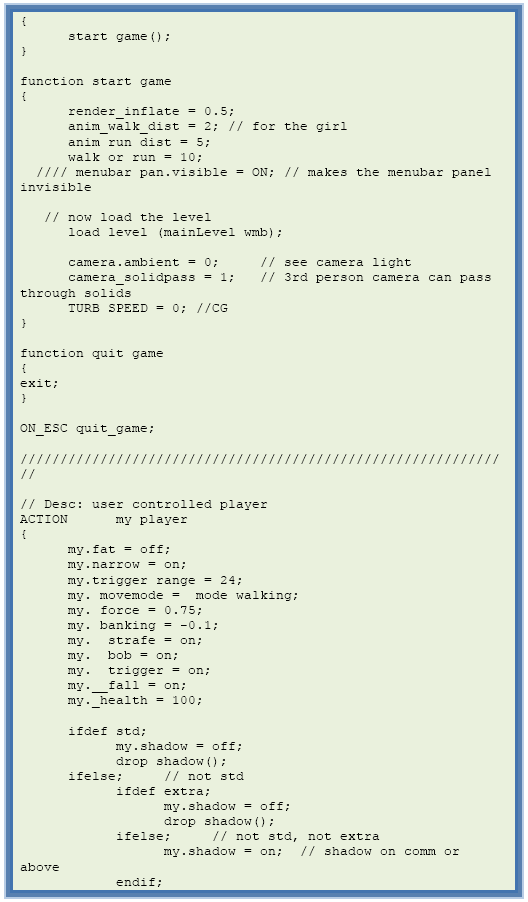

- To add a script to your game, click on File à Map Properties
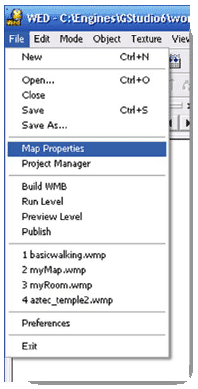
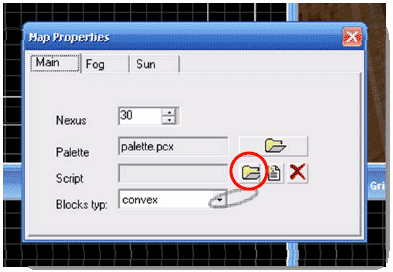
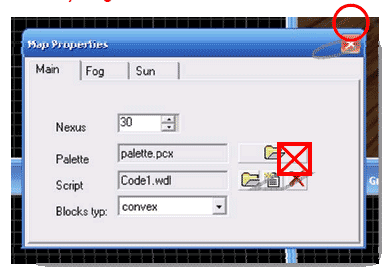
- A pop-up menu entitled Map Properties will appear. As you can see in the Script Box, no script has been defined. To do this, click the Folder icon to the right of the Script Box
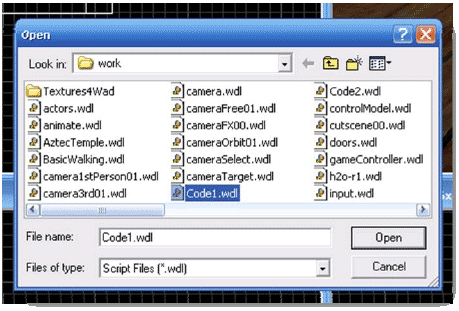
- A pop-up menu will open that defaults to the "Work Folder." From here, select the script file (".wdl") that contains the code for your game. We will use "Code1.wdl"
- Now you will return to the Map Properties dialog box. As you can see, the script file is now inside the Script Box
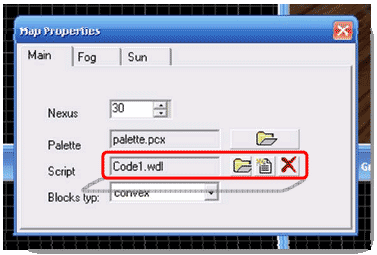
- Then close this menu out simply by clicking the close button. Clicking the red X to the right of the Script Box will remove the script you just added to your game
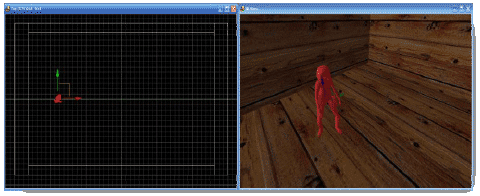
- Now select the model that you want to add a Behavior to. When selected, your model will appear in a red wire frame
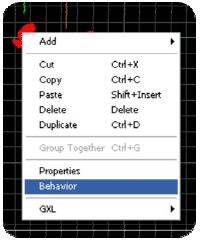
- Right-Click the selected model and choose Behavior
- A pop-up menu will appear. In this menu, you can select the Behavior that you want your model to have. The Behaviors are described in your script. For example, if you want your model to be the character that you play as, choose "my_player" for a health pack, choose "health_pack," etc. You can customize any Behavior and even create your own in the script. But for now, simply select "my_player" and press OK
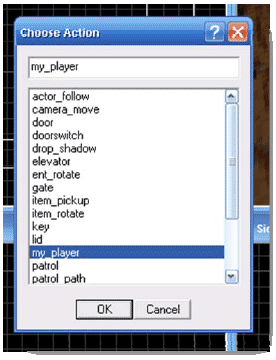
- Your model now has the Behavior that you chose for it! See how easy and fun that was? You now should have learned all the basic elements of creating a game. If you want to Build and Run your game, you can do so now!
3 COMPLILING AND RUNNING
In order to test a game out, it needs to be Compiled. Compiling takes all the code, models, and levels that have been put together and converts it into a language that the computer can readily understand: machine language !
Please take note that this doesn't create your executable file. This simply allows you to "run" your game
- First, Click the Build button
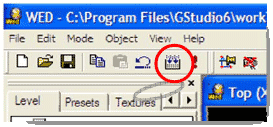
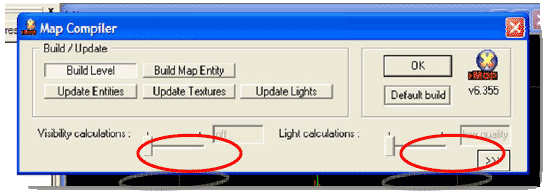
- A pop-up menu will appear that lets you adjust what exactly you want to compile or update. If you're just doing a quick test, make sure that your Visibility Calculations and Light Calculations are set to Off and Low Quality. This will dramatically reduce the time it takes to compile your game. You shouldn't be able to see a difference between these settings, and (for productivity purposes) you should wait to turn these on until you have finished tweaking your game
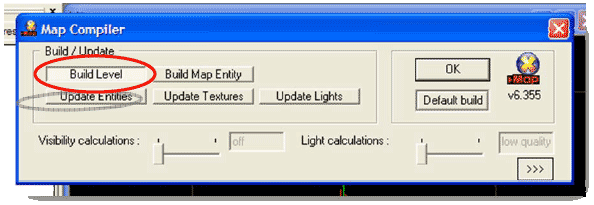
- Make sure that the Build Level button is selected and click OK
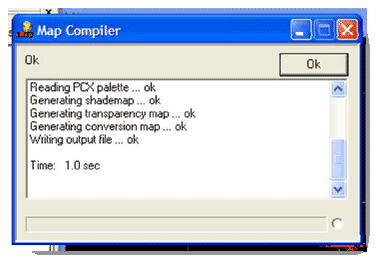
- A Map Compiler dialog box will appear and, depending on the complexity of your game, the time it takes to compile your game will vary.
- Click the Run button
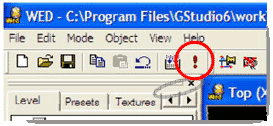
- Click the Ok Button once more in the "Run Level" dialog box

- Your game will now start! Now how have some fun!
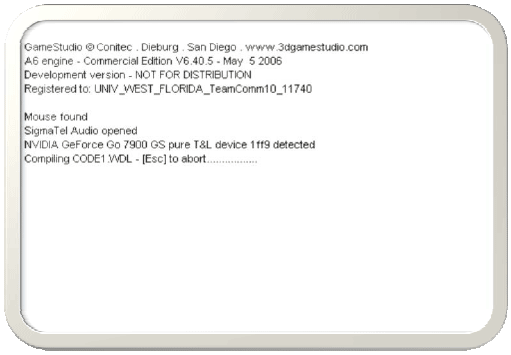
Congratulations you now have all the basic skills to make your own game using GameStudio! Now begin making your own fun games!
About the authors
| Rex Cason II has been working with Dr. Prayaga in the UWF Game Department for the past few semesters. He currently possesses a Bachelor's degree in Computer Science and is working towards a Master's degree in Software Engineering at the University of West Florida. Rex is also an active member in the Association of Information Technology Professionals (AITP). In addition to his studies, Rex works part time at the Institute for Human and Machine Cognition (IHMC), where he is currently working on developing software to coordinate the actions of semi-autonomous robotic vehicles.
|
Erik Larson has been working with computers since he had purchased a cheap 386 IBM Compatible in 1995. In 1999, he entered the United States Marine Corps and pursued a specialization in computers. Today he is working towards a Master's degree in Software Engineering with the University of West Florida. He currently possesses Bachelor's degrees in Information Technology and Computer Information Systems with minors in Computer Science, Internet Technologies and e-Business also from the University of West Florida. He is a member of the Phi Kappa Phi, Gamma Beta Phi, and Upsilon Pi Epsilon Honors Societies.
|
Jonathan Robertson currently works at the Game Design Department of the University of West Florida. A student of UWF as well, his studies is focused on the field of Information Technology and Computer Science. His experience, though not without focus, is spread out over most if not all areas of Game Design (including but not limited to game development programming, art primarily limited to character design, music, story development, statistical balancing, gameplay enhancement, and minimal project management).
|
|
Jonathan Frisch is working for a degree in Digital Media and studying animation/modeling itself and in games and movies. He hopes to get into the animation/modeling field of game development or movie production. His ultimate future goal is to be an independent film writer/director.
|
George Trice III is an Honors student double-majoring in Interdisciplinary Information Technology: Digital Media and Art with a Digital Specialization. His minor is in Communication Arts. He's been a gamer since age 5. Favorite game of all time: Super Mario World
|
Dr. Lakshmi Prayaga has recently completed her ED.d program from the University of West Florida. She has been actively working on the influence of games in education. In partnership with Escambia county in Florida, she was awarded a $1.5 million grant from the Florida department of education to develop serious games for 7th and 8th graders for mathematics and its relation to real life careers. These games will be implemented during this fall (2007). She is starting a gaming curriculum at the University of West Florida, and some of her students are working on the tutorials for a first person shooter game that will appear in the next few columns.
|
Cite this article as follows: Rex Cason, Erik Larson, Jonathan Robertson, Jonathan Frisch, George Trice, Dr. Lakshmi Prayaga: "First Person Shooter Game" Journal of Object Technology, vol. 7, no. 1, January-Februar 2008, pp. 43 - 58 http://www.jot.fm/issues/issue_2008_01/column5
|


