Abstract3D game development is an exciting activity for many students. But getting a handle on 3D game development for novices may be a daunting task. We take this opportunity to present a quick introduction to 3D game development through a few tutorials. For the next few columns a set of tutorials for a 3D first person shooter game developed by graduate and undergraduate students under the guidance of a faculty member from the University of West Florida will be presented. These tutorials were developed with 3D game Studio by Conitec. To follow along, download the software from www.conitec.com. These tutorials include all elements of game development such as modeling and animation, lighting, collision detection, sound and scripting. Each tutorial will focus on one or more of these aspects. This week we start out with creating a room and adding some objects to the room. The instructions for this are presented below. BASIC TERRAIN CREATIONIn this tutorial, we will be making a terrain in MED which we can then use as a game level in 3D GameStudio. The process is rather simple: start a new terrain, manipulate it, save it, and then load it into WED. It's supposed to be that simple because all the terrain is (usually) the foundation for the level. All of the details like houses, trees, walls and such are placed on the terrain to give it a more inviting (or imposing) atmosphere Let's start by opening MED. After that, hit the File --> New Terrain option to begin the process
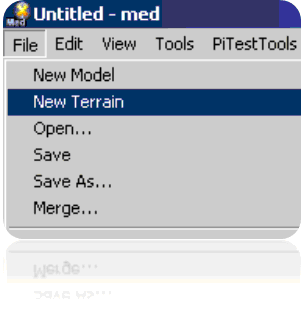
A new window will come up requesting a few parameters
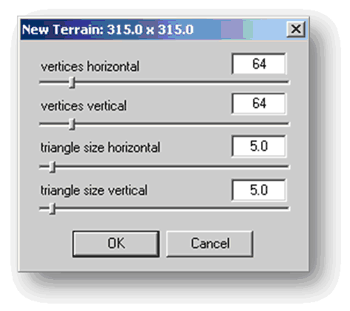
Notice the number of vertices horizontally and vertically is 64 (the arrow keys can increment and decrement by 1). This is because it is a 2 n number and it will simplify things when we will texture it. Almost any other number desired can be used, but textures will always look best when the area is an exponent of 2. OK; now we have our bare terrain. It should look something like the following:
Coolness. If so desired, you could save it and use it as is. However; this is not recommended, of course, because there is much more that we could do with it. For the remainder of the tutorial, we'll be focusing on 3 things:
The Magnet Toolbar to specify some properties of the magnet tool
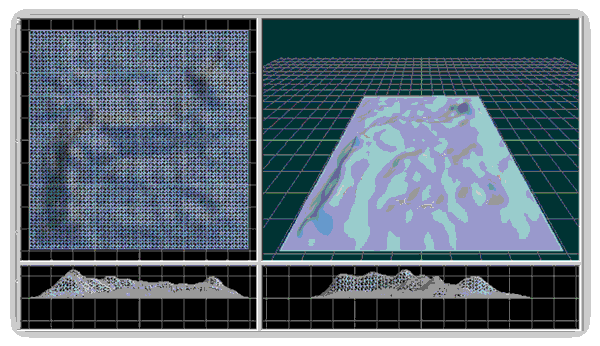
The way to use the magnet tool is to Left-Click over the region you wish to raise and that section will be raised by the information in the magnet toolbar. Right-Clicking lowers instead of raises. These are the things to pay the most attention to in the toolbar: Range, Repeat, Step, and Form. The Range specifies the size of the area to be altered around the cursor, the Repeat is to tell how often we want the changes to be made while we hold down the mouse button, the Step says how small or large the changes should be, and the Form is the general shape that will be used As you can see in the toolbar, the range is set to 13, the repeat is set to 100 ms, step is set to 1 and the form is set to 3. This means that the area we will be affecting is of size 13. If we had a larger number there, the area of influence would be larger. The repeat, because it is set to 100 ms (milliseconds), it means that the changes are made 10 times every second. If the number had been smaller, then we would see the changes more rapidly. The step indicates how high the changes will be. If the step were larger, then for every 100 ms the growth would be much higher. Finally, the form is set to 3: a gradual mound shape. There are a few shapes to choose from. This one fits our needs for the moment Let's start by adding a little range of hills
As you can see, the terrain now has some creases in it to make it look bumpy. This is a cool start but let's see what else we can do
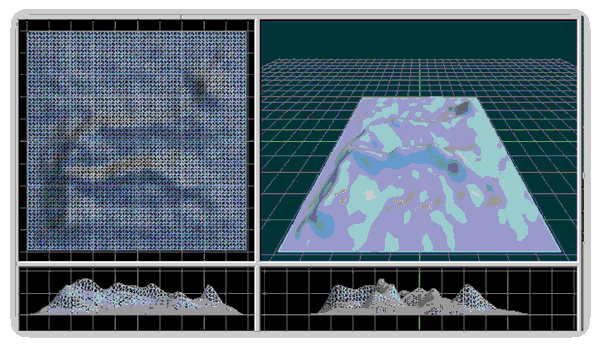
I changed the range to 25 and the step to 2 then added a little more emphasis to the range. It definitely looks more crinkled now. Let's try a different form and see what happens
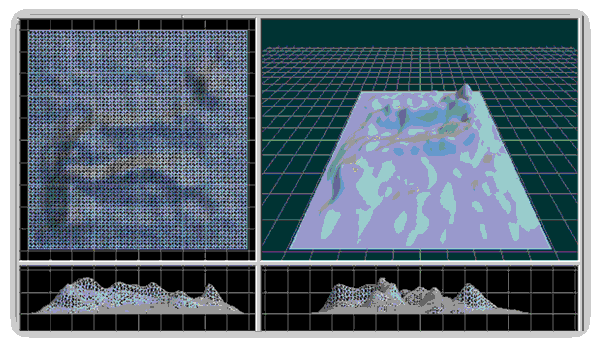
This time, I tried using form 5 which had a really sharp point. I used this to further create a spine-like structure along the ridge and a branching arm because the area looked empty. There's another region on the other side that looks a little drab. Use the camera position button and rotate around the terrain to the other side
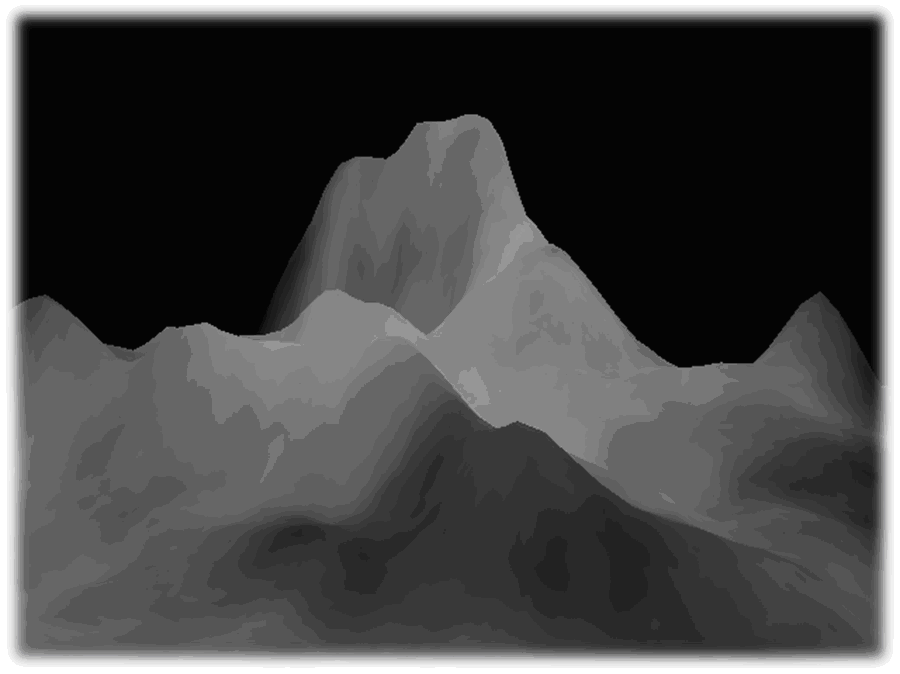
Here's the other side. See that big place there? I bet it'd look cool with a mountain or something. Let's see if we can pull that off
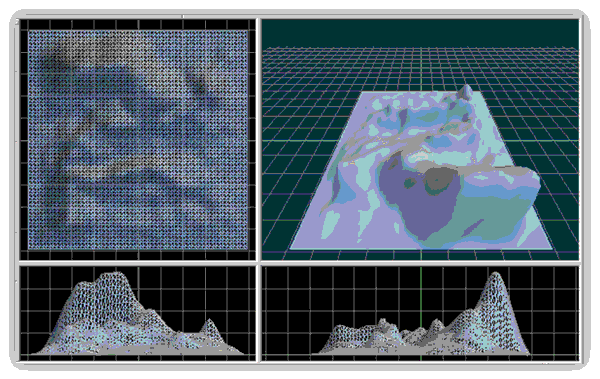
This time I bumped up the range to a 47 and changed the form to 1 that had a really sharp �peak' appearance. The final outcome was not that bad with a basic texture
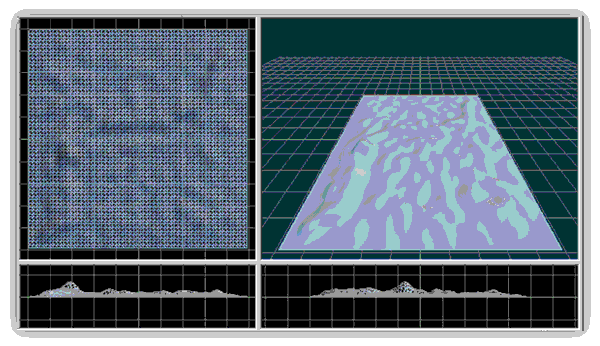
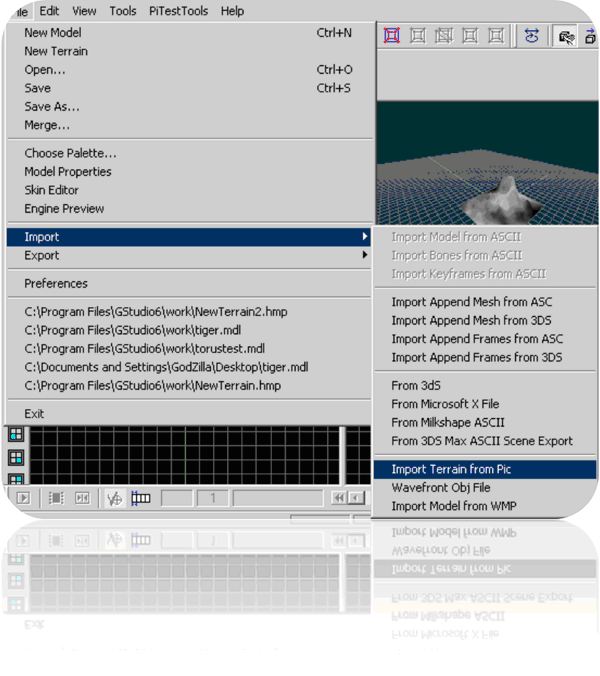
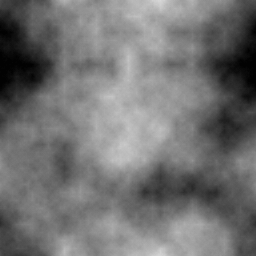
I admit that the texture above is uninteresting, but adding a texture makes it "viewable" in GameStudio. Without such, it would've been a bland white with hardly any definition. I will forgo the methods on how to create a texture as it is beyond the scope of this tutorial and will be covered later on. You now have a terrain that you can use in GameStudio! I have included the texture file so that you will have one accessible to you for such occasions. This brings us to the next topic I wish to discuss Importing Height MapsWithin MED you not only can create terrains directly, but you can import images to be used as Height Maps. Height Maps are nothing more than creating elevation based on color. Usually, gray-scale images (images that go from black to white with numerous shades of gray in between) are used for such events. Luckily that drab texture that you possess (the one which I provided) is a perfect example for this exercise Make sure that everything you have been working on in MED is saved and stored before going on as MED will remove the old environment before creating the new terrain. Once this box is checked: Select File à Import à Import Terrain from Pic
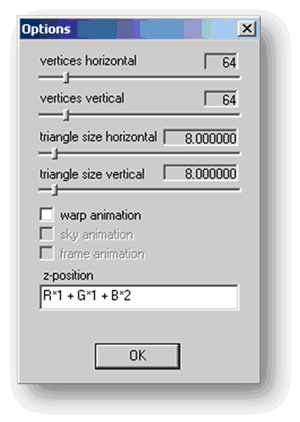
From there, find the file testTexture.bmp and hit "open". A little options box will pop up asking for some input
Use the settings specified above. If you don't the program will get mad at you and maybe stop listening to your pleas of cooperation. Should this happen, just close MED and reopen it. The reason for the problems that can arise is that the program knows that powers of 2 are the most acceptable and will notify you if something is not a power of 2. If the program ever has a problem with being unable to map out the terrain, close the program and start it again
You should now have something like the previous image on your screen. We can retexture it later since the height map is only for obtaining elevation information. As for right now though, all we have to do is save the terrain and we have something we can use in GameStudio! Amazing! Wow! When making height maps, remember to use powers of 2 (2^n or 2n) because that is what video cards (as well as MED) prefer to use. Use that as the canvas width and height in your graphics program (Adobe Photoshop, GIMP, Paint.Net, etc) and then use gray gradients to map out the elevations. You do not need to shoot for some huge number to ensure large terrains � all terrains can be resized in the World Editor (WED) to whatever size you want.About the authors
Rex Cason II, Erik Larson, Jonathan Robertson, Jonathan Frisch, George Trice III, Dr. Lakshmi Prayaga : "First Person Shooter Game" Journal of Object Technology, vol. 7, no. 7, Septebmer-October 2008, pp. 39-51 http://www.jot.fm/issues/issue_2008_09/column4/ |
|||||||||||||||||


